Schedule
One line: Schedule is where you tell Odara when a pipeline or maestro should run on its own — daily, hourly, on a custom cron — and who gets emailed when something goes wrong.
This tutorial walks through Schedule end to end on a fresh install,
using the bundled [email protected] account. You'll learn how to:
- Open Schedule
- Read the schedule list
- Create a daily schedule (Visual Builder)
- Switch to advanced cron mode
- Configure email alerts (SMTP + subscriptions)
- Pause, run-now, or delete a schedule
It takes about 7 minutes.
1. Sign in
Open Odara at your install URL (the dev default is
http://localhost:5175) and sign in with the tutorial account:
- Email:
[email protected] - Password:
tutorial-demo-2026
If your install does not have the tutorial user, any regular user account works — you just need permission to view schedules.
2. Open Schedule
In the top bar, click the Editor dropdown (between the project selector and the user menu) and choose Schedule.
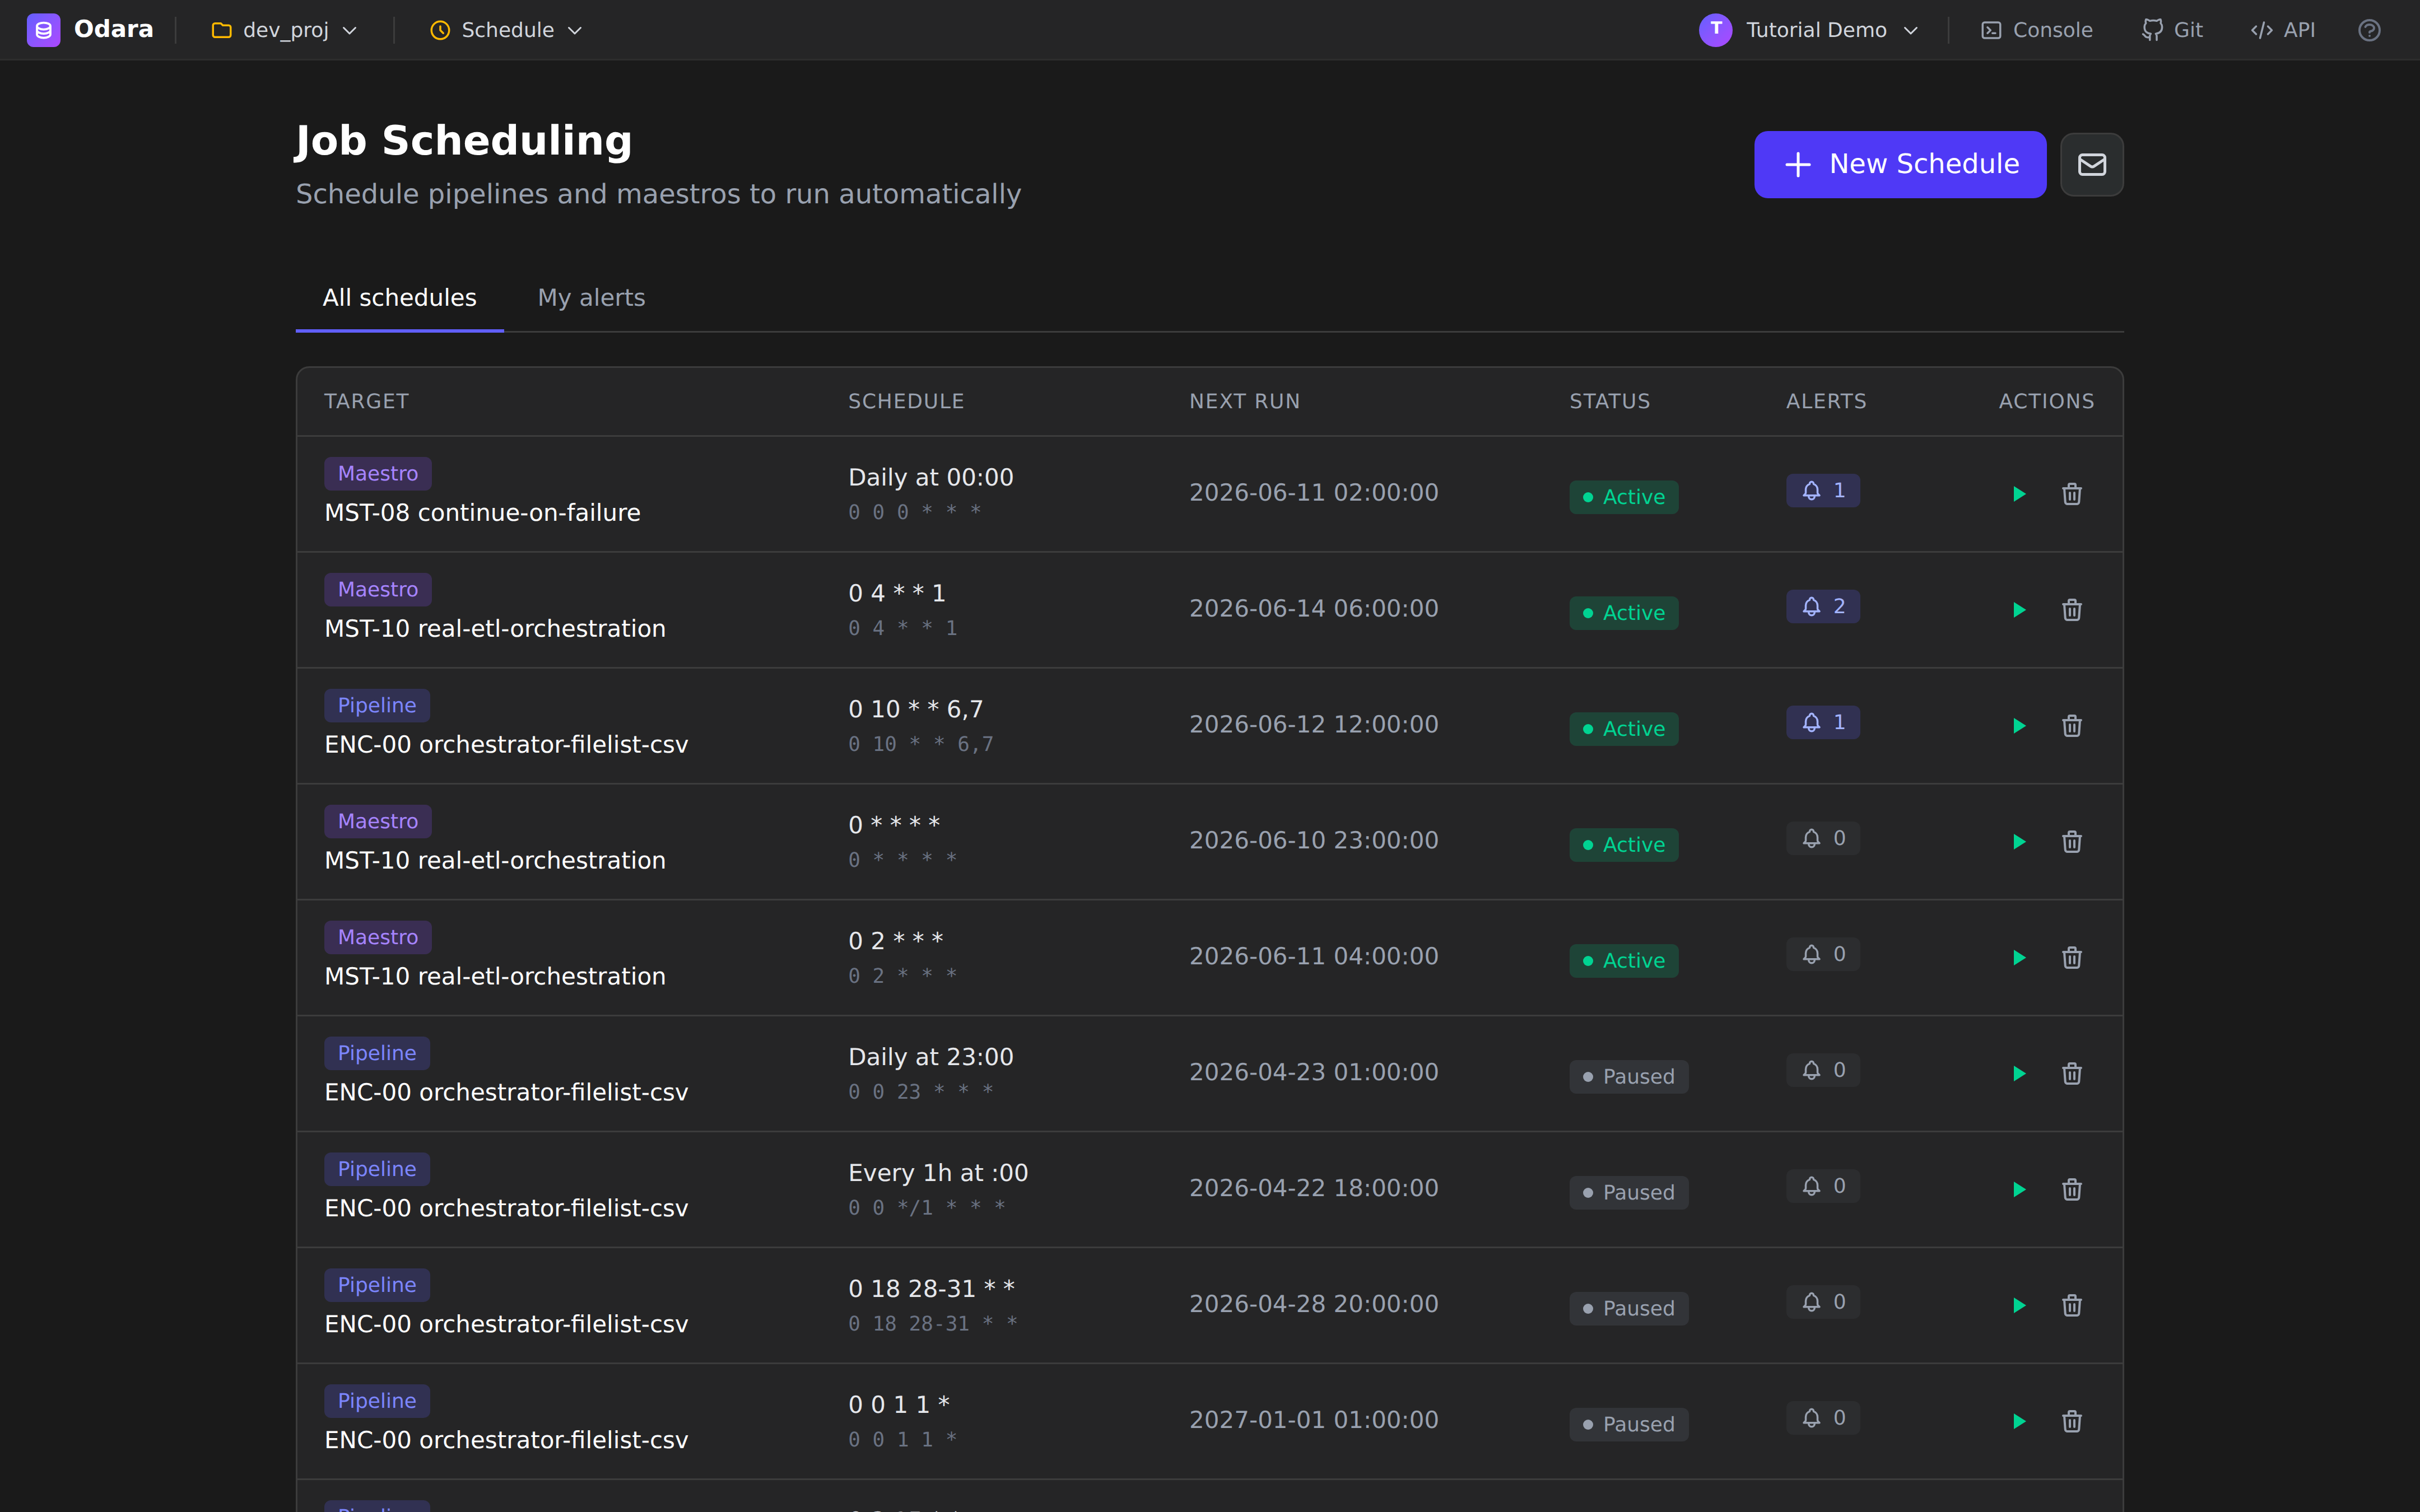
You land on the Job Scheduling page. The header reads "Schedule pipelines and maestros to run automatically." Below the header are two tabs:
- All schedules — every schedule in this project.
- My alerts — the schedules where you are subscribed to receive email notifications.
The table shows, for each schedule:
| Column | What it tells you |
|---|---|
| Target | A pill (Pipeline or Maestro) plus the name of the job that will run. |
| Schedule | A human-readable line ("Daily at 00:00", "Every 1h at :00", "0 4 * * 1") plus the underlying cron in muted text. |
| Next run | The next absolute date/time the scheduler will fire. |
| Status | Active (will run) or Paused (frozen). |
| Alerts | How many users are subscribed to email notifications for this schedule. |
| Actions | Run-now (▶) and delete (🗑) — visible on hover. |
3. Create a schedule — Visual Builder
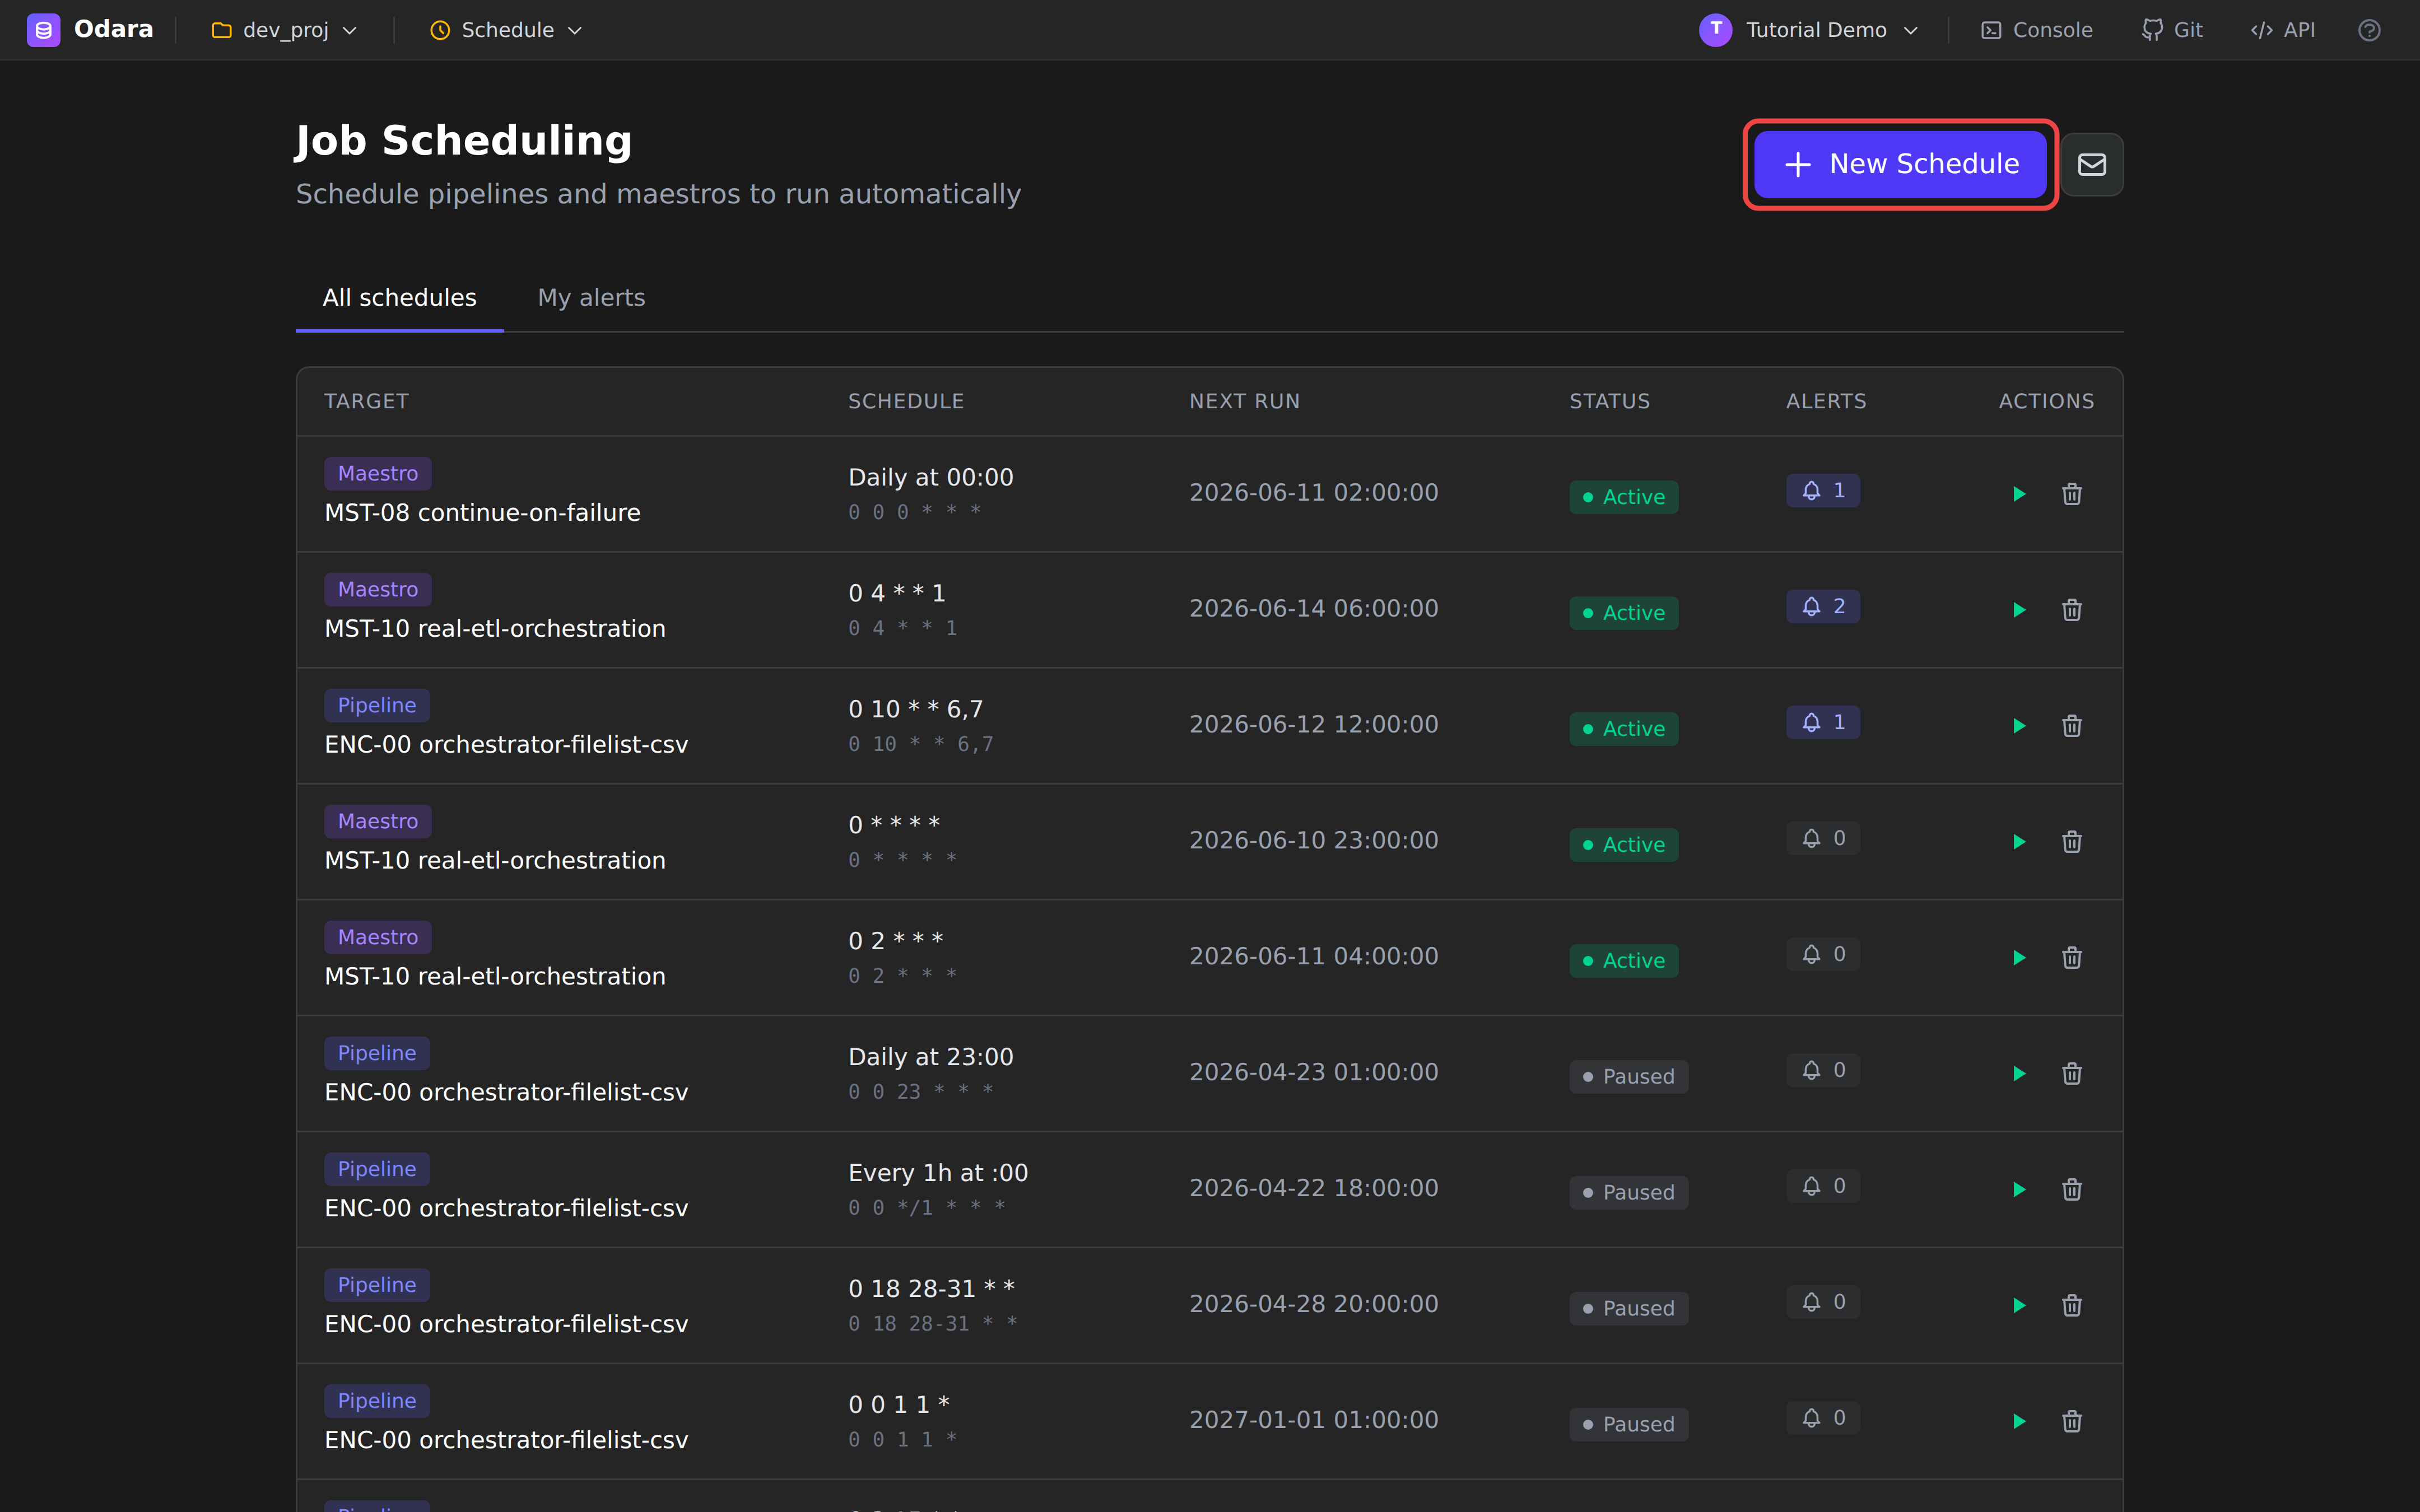
The most common case ("run this pipeline every day at midnight") never needs you to write a cron expression. Click the purple + New Schedule button in the top-right.
The Create Schedule modal opens. It has two modes — Visual Builder and Advanced (Cron) — toggled by the buttons just under the title. Visual Builder is the default.
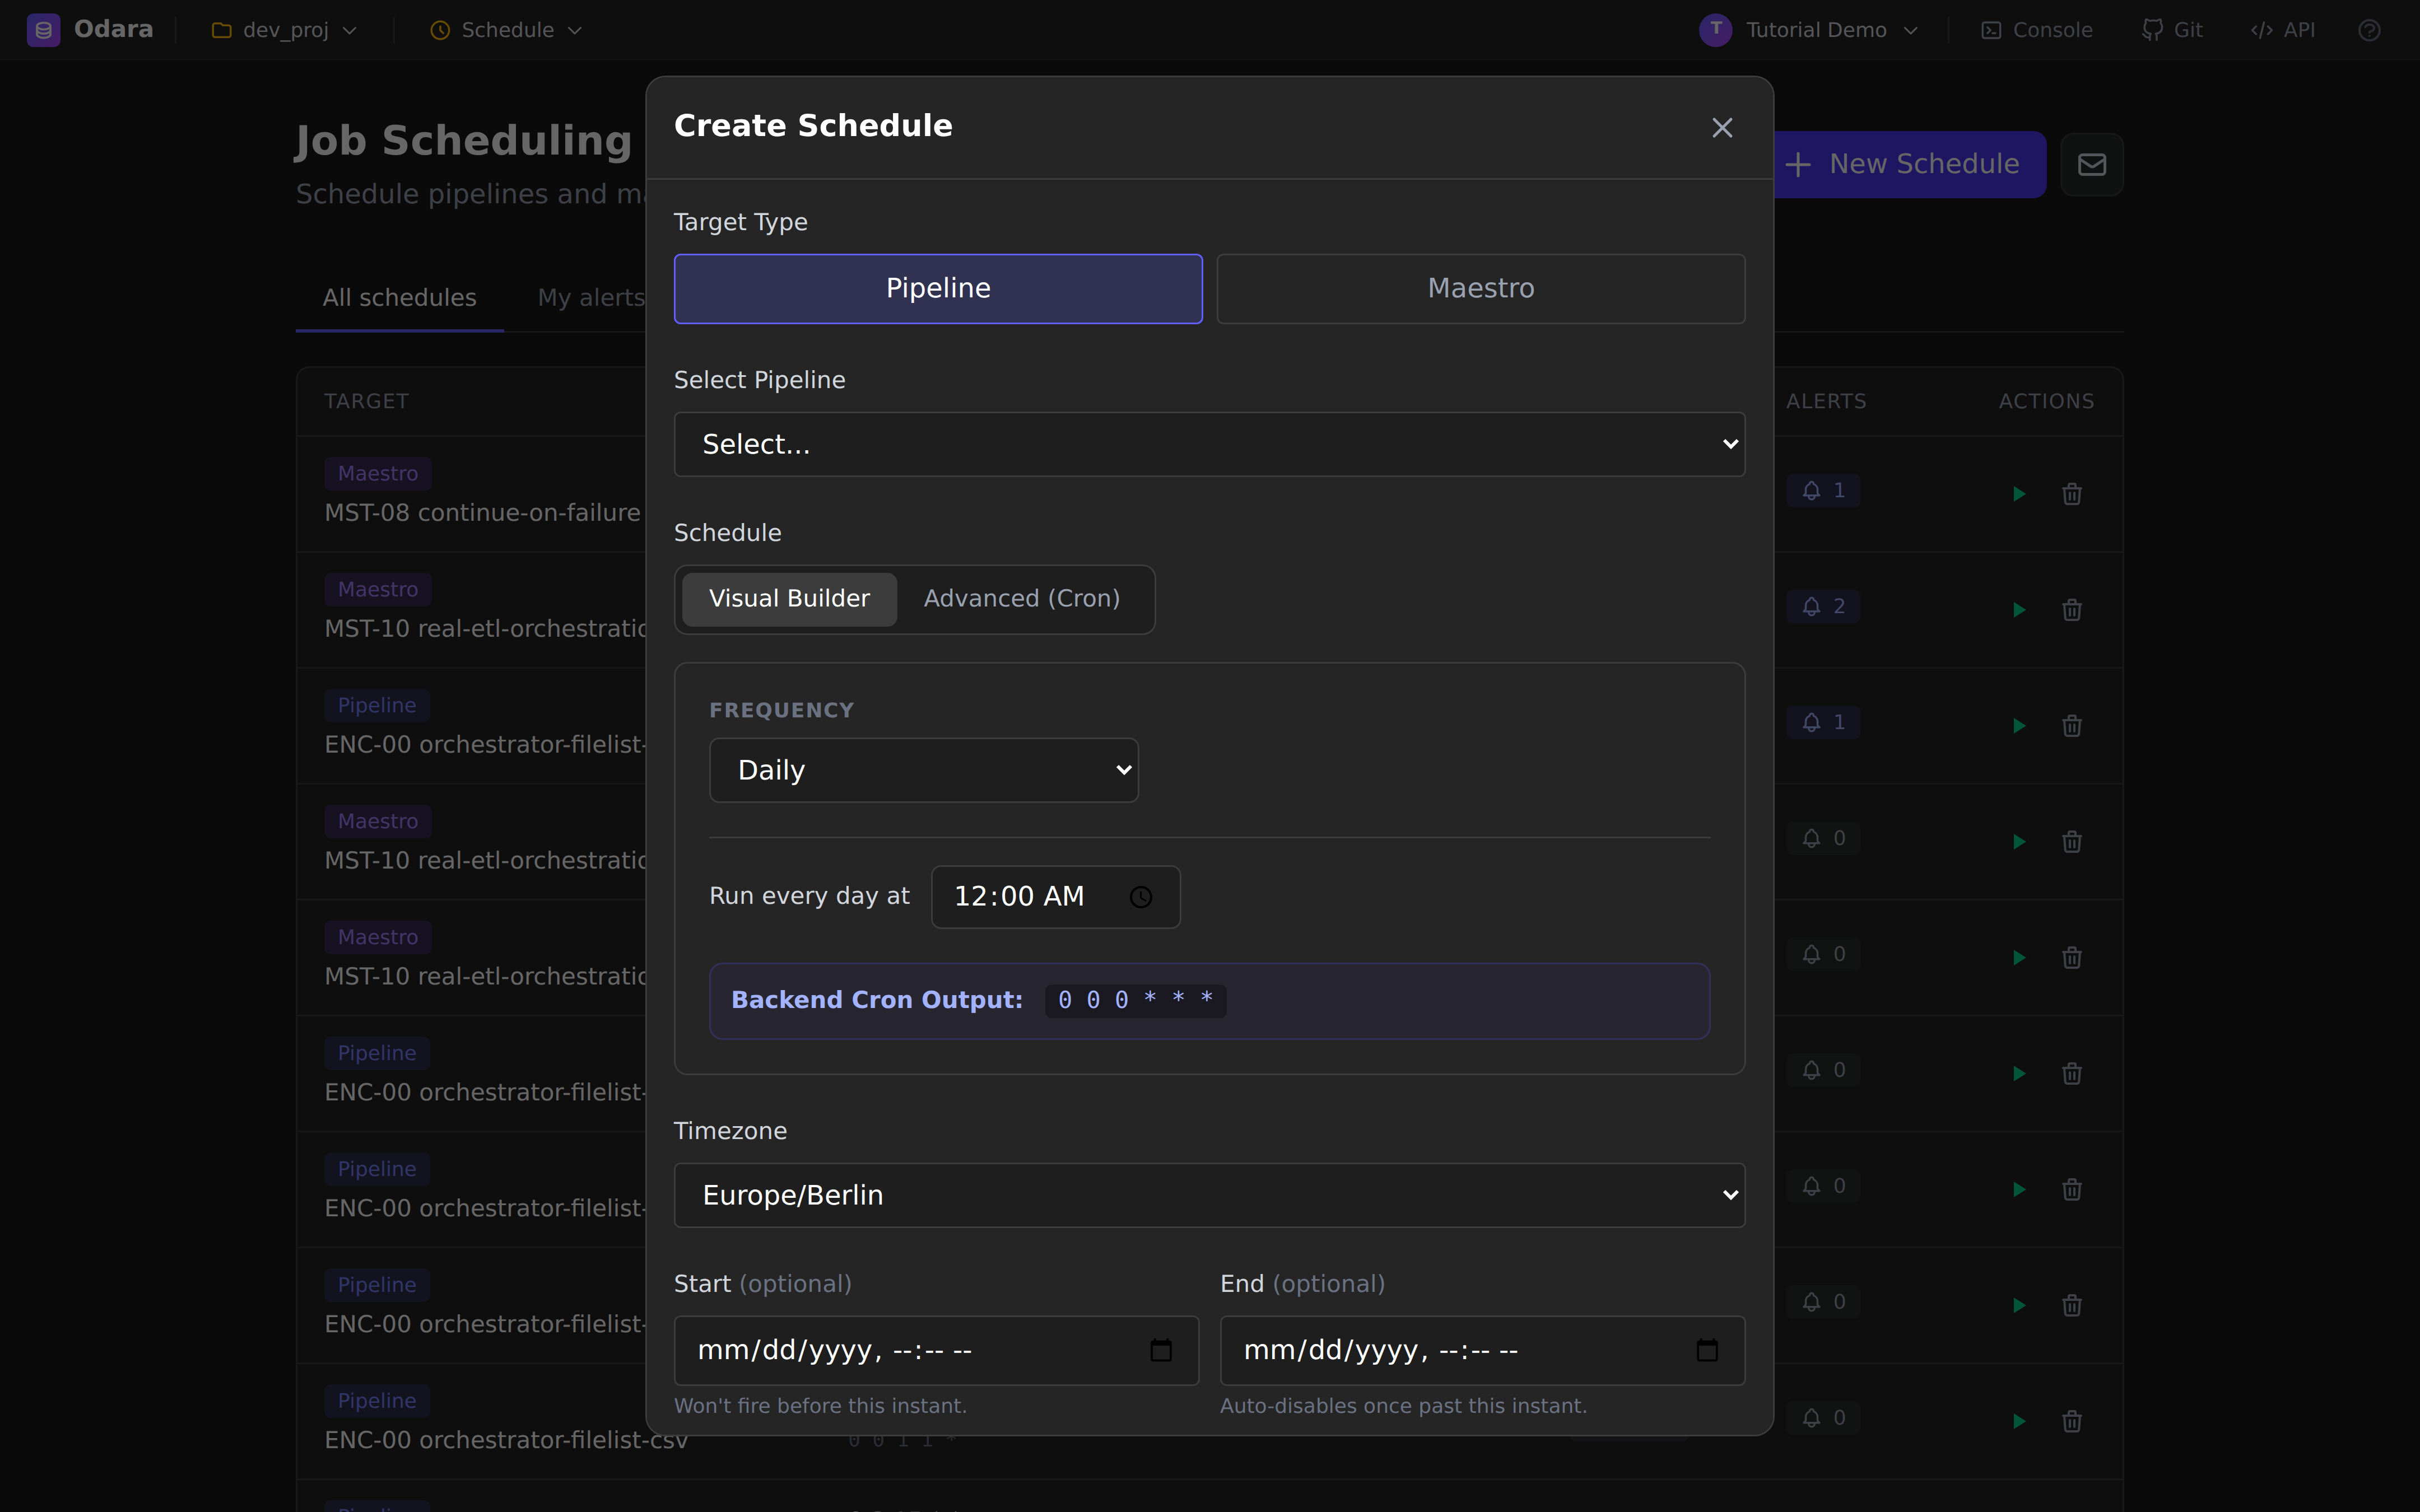
Fill in three things:
- Target type — Pipeline or Maestro. Switch the toggle if you want to schedule an orchestrated maestro instead of a single pipeline.
- Pipeline (or Maestro) — pick the job from the dropdown.
- Frequency — Daily, Hourly, Weekly, Monthly, Every-N-minutes.
The preview line at the bottom ("Runs daily at 00:00") always shows the schedule in plain English plus the equivalent cron in muted text, so you can sanity-check before saving.
Trying a different frequency
Switch the Frequency dropdown to something other than Daily — say, Hourly — and the form rebuilds itself around the new options (minute-of-hour input, weekday selector, etc.).
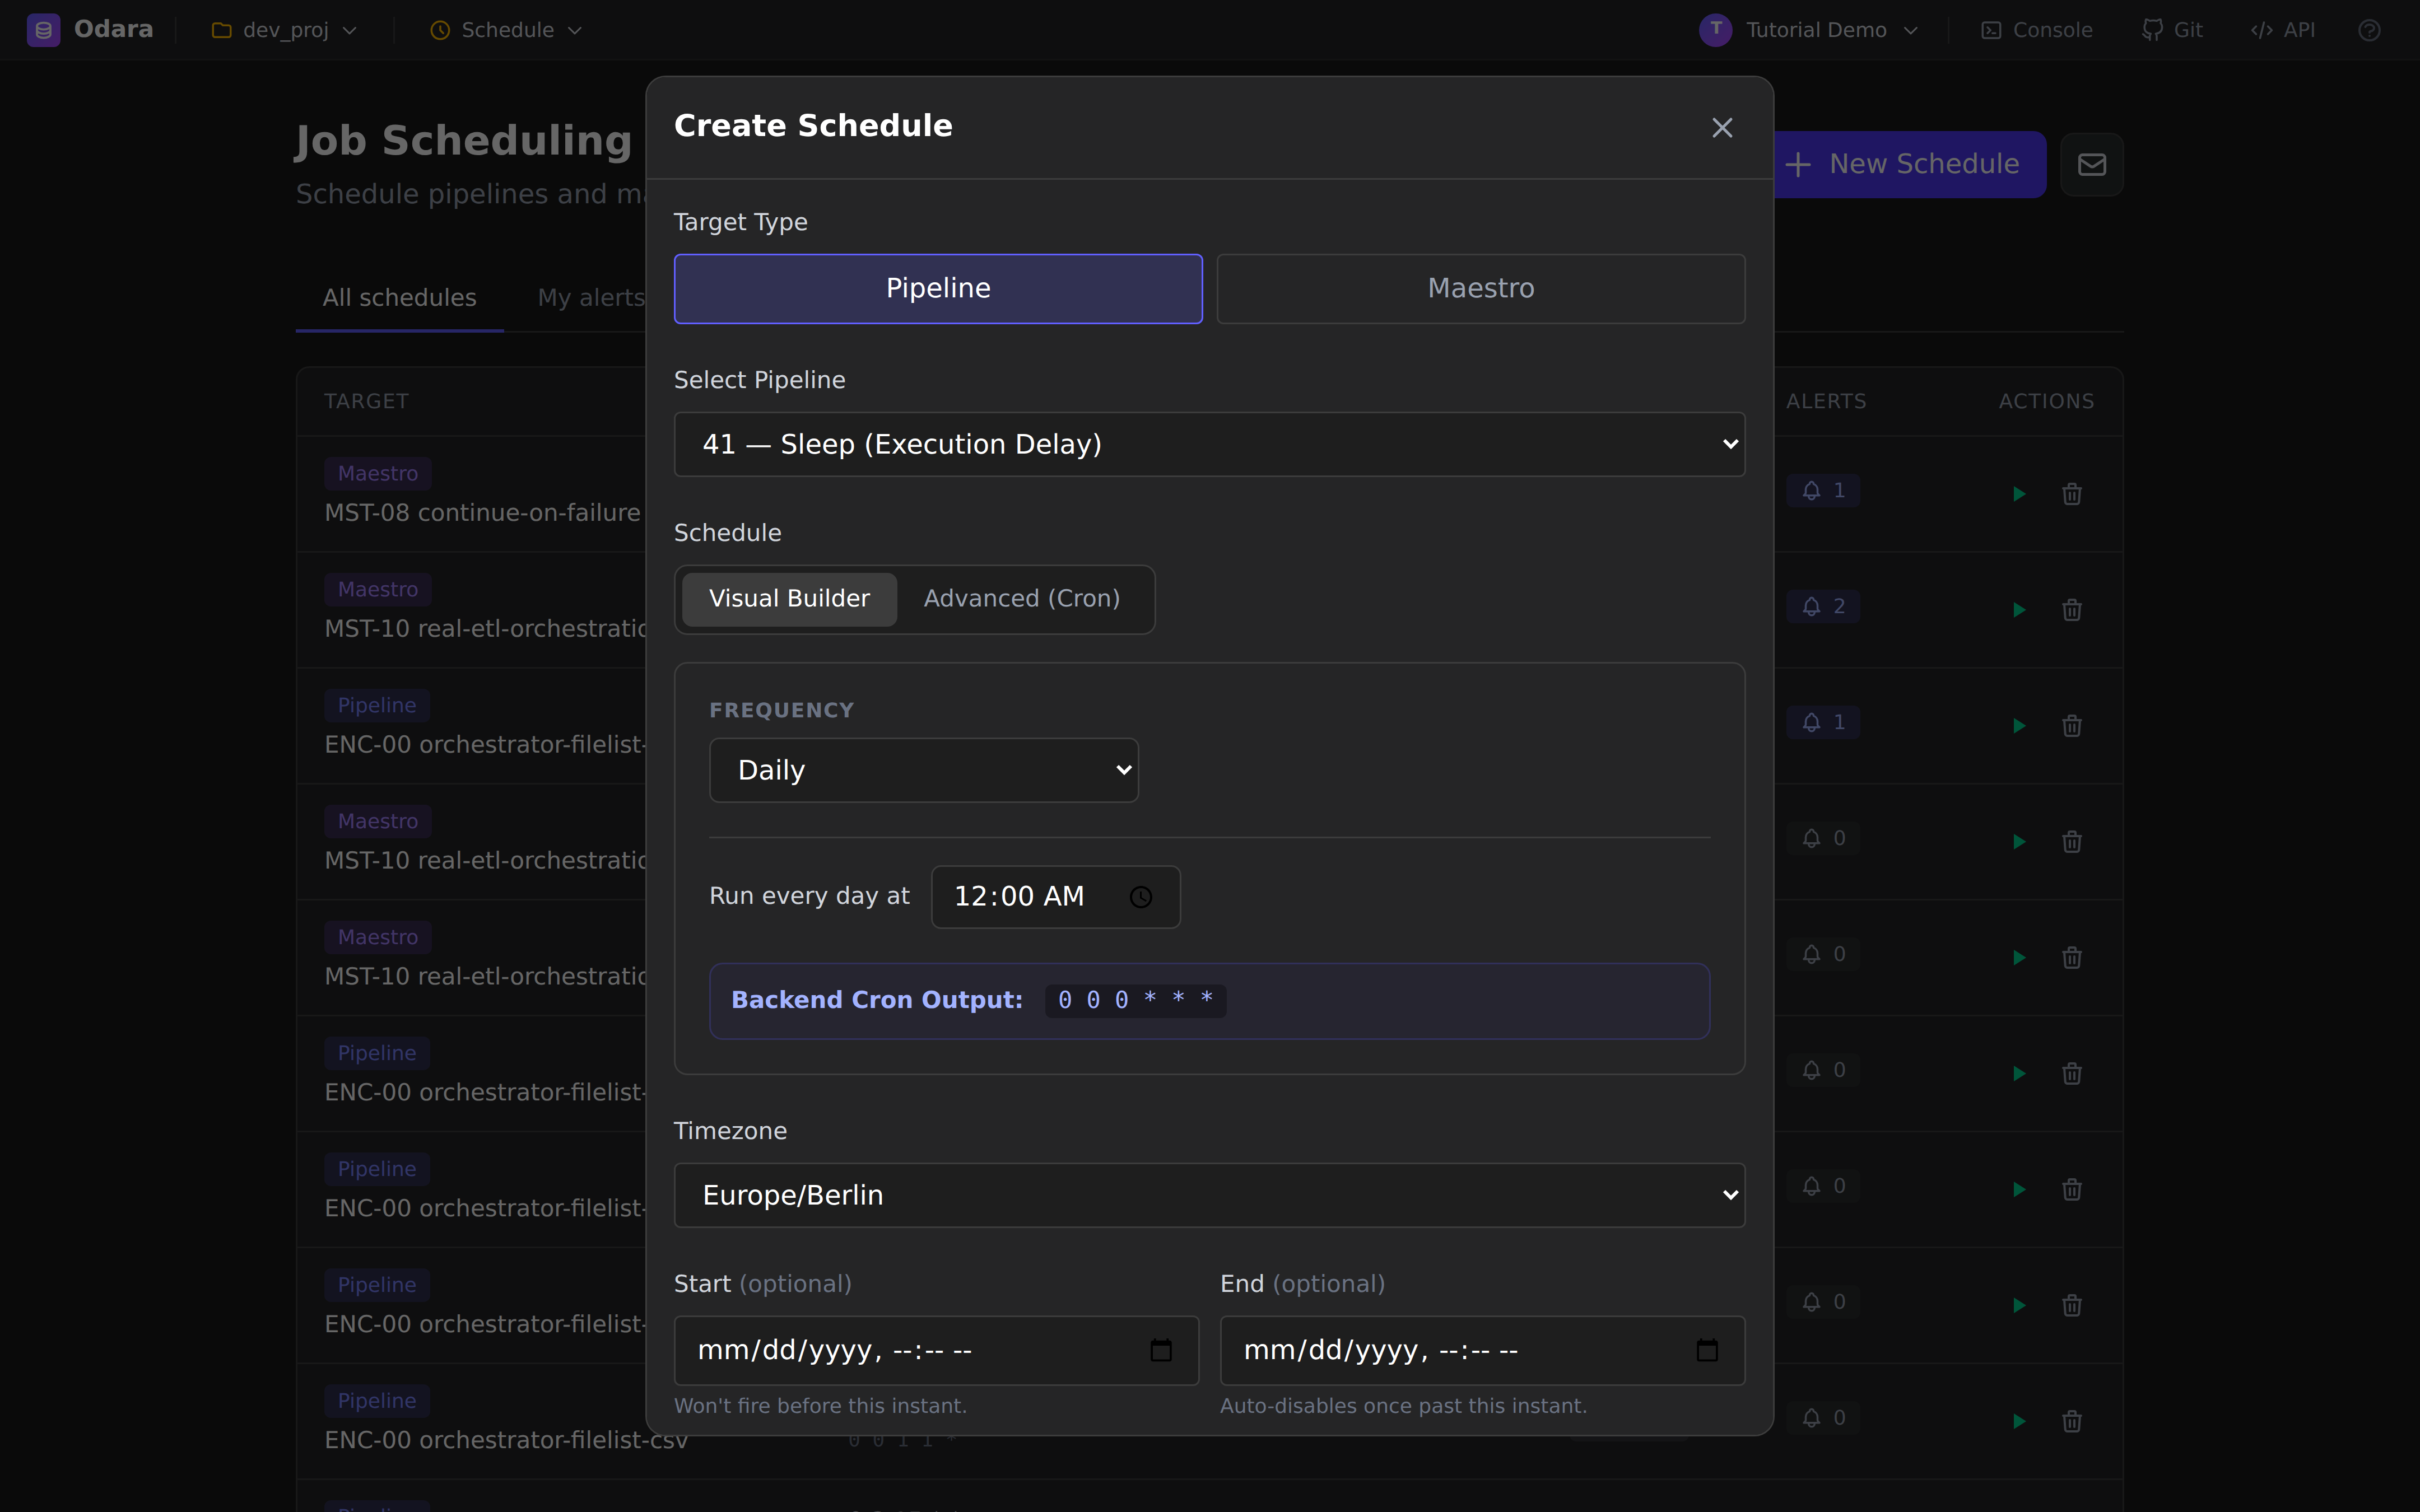
The preview updates live so you can see what the new pick translates to before saving.
4. Advanced — write the cron yourself
For anything Visual Builder cannot express — "every weekday at 4 a.m. except Wednesdays", "every 15 minutes between 9 and 17" — click Advanced (Cron) at the top of the modal.
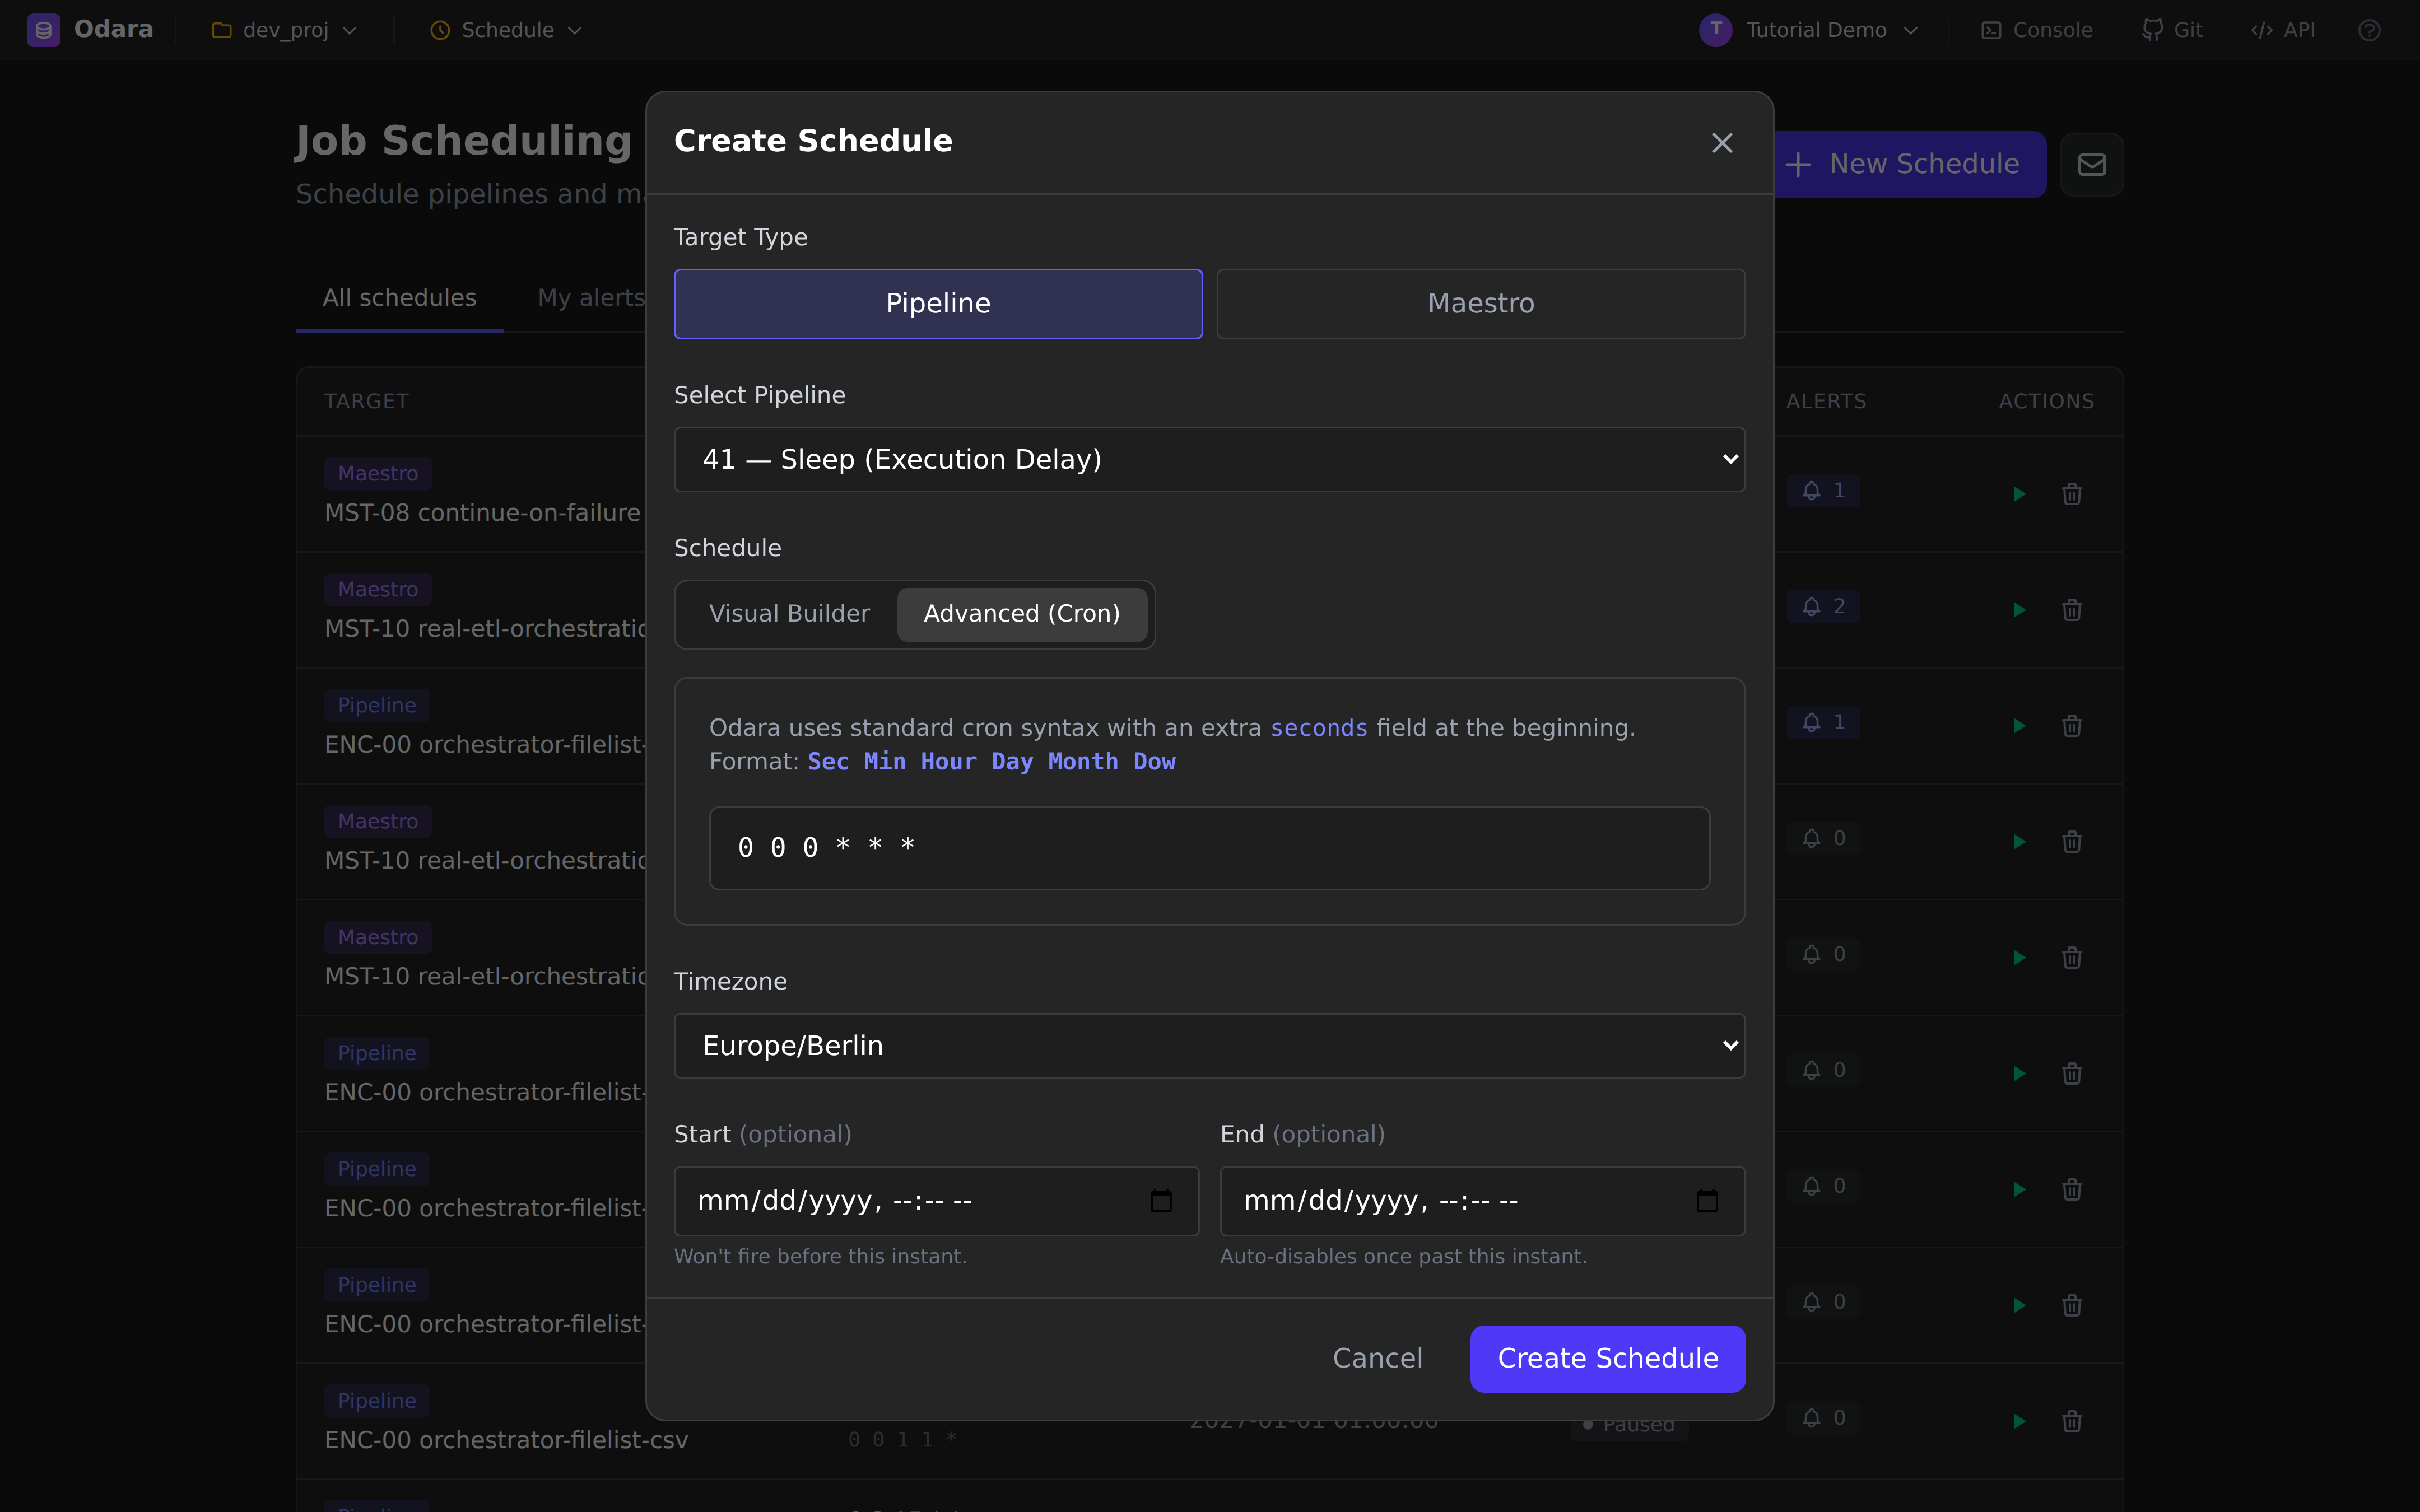
The form collapses down to a single text input. Type a standard
5-field cron (min hour day-of-month month day-of-week). A few quick
examples:
| Cron | Means |
|---|---|
0 0 * * * |
Daily at midnight |
*/15 * * * * |
Every 15 minutes |
0 9 * * 1-5 |
09:00 every weekday |
0 4 1 * * |
04:00 on the 1st of every month |
The preview line still translates your cron back to English ("Runs at 04:00 on day 1 of every month") so a typo doesn't quietly become a schedule that fires at the wrong time.
When the preview matches what you want, hit Save. The modal closes and your new entry appears in the table, Active by default with a populated Next run column.
5. Email alerts
Odara can email you when a scheduled job finishes — every time, on failure only, or never. Alerts are a two-step thing:
- Configure SMTP once (admin task — the server needs to know how to send mail).
- Subscribe per-schedule (each user picks which schedules they care about).
Open the alerts configuration
Click the small envelope icon to the right of the + New Schedule button.
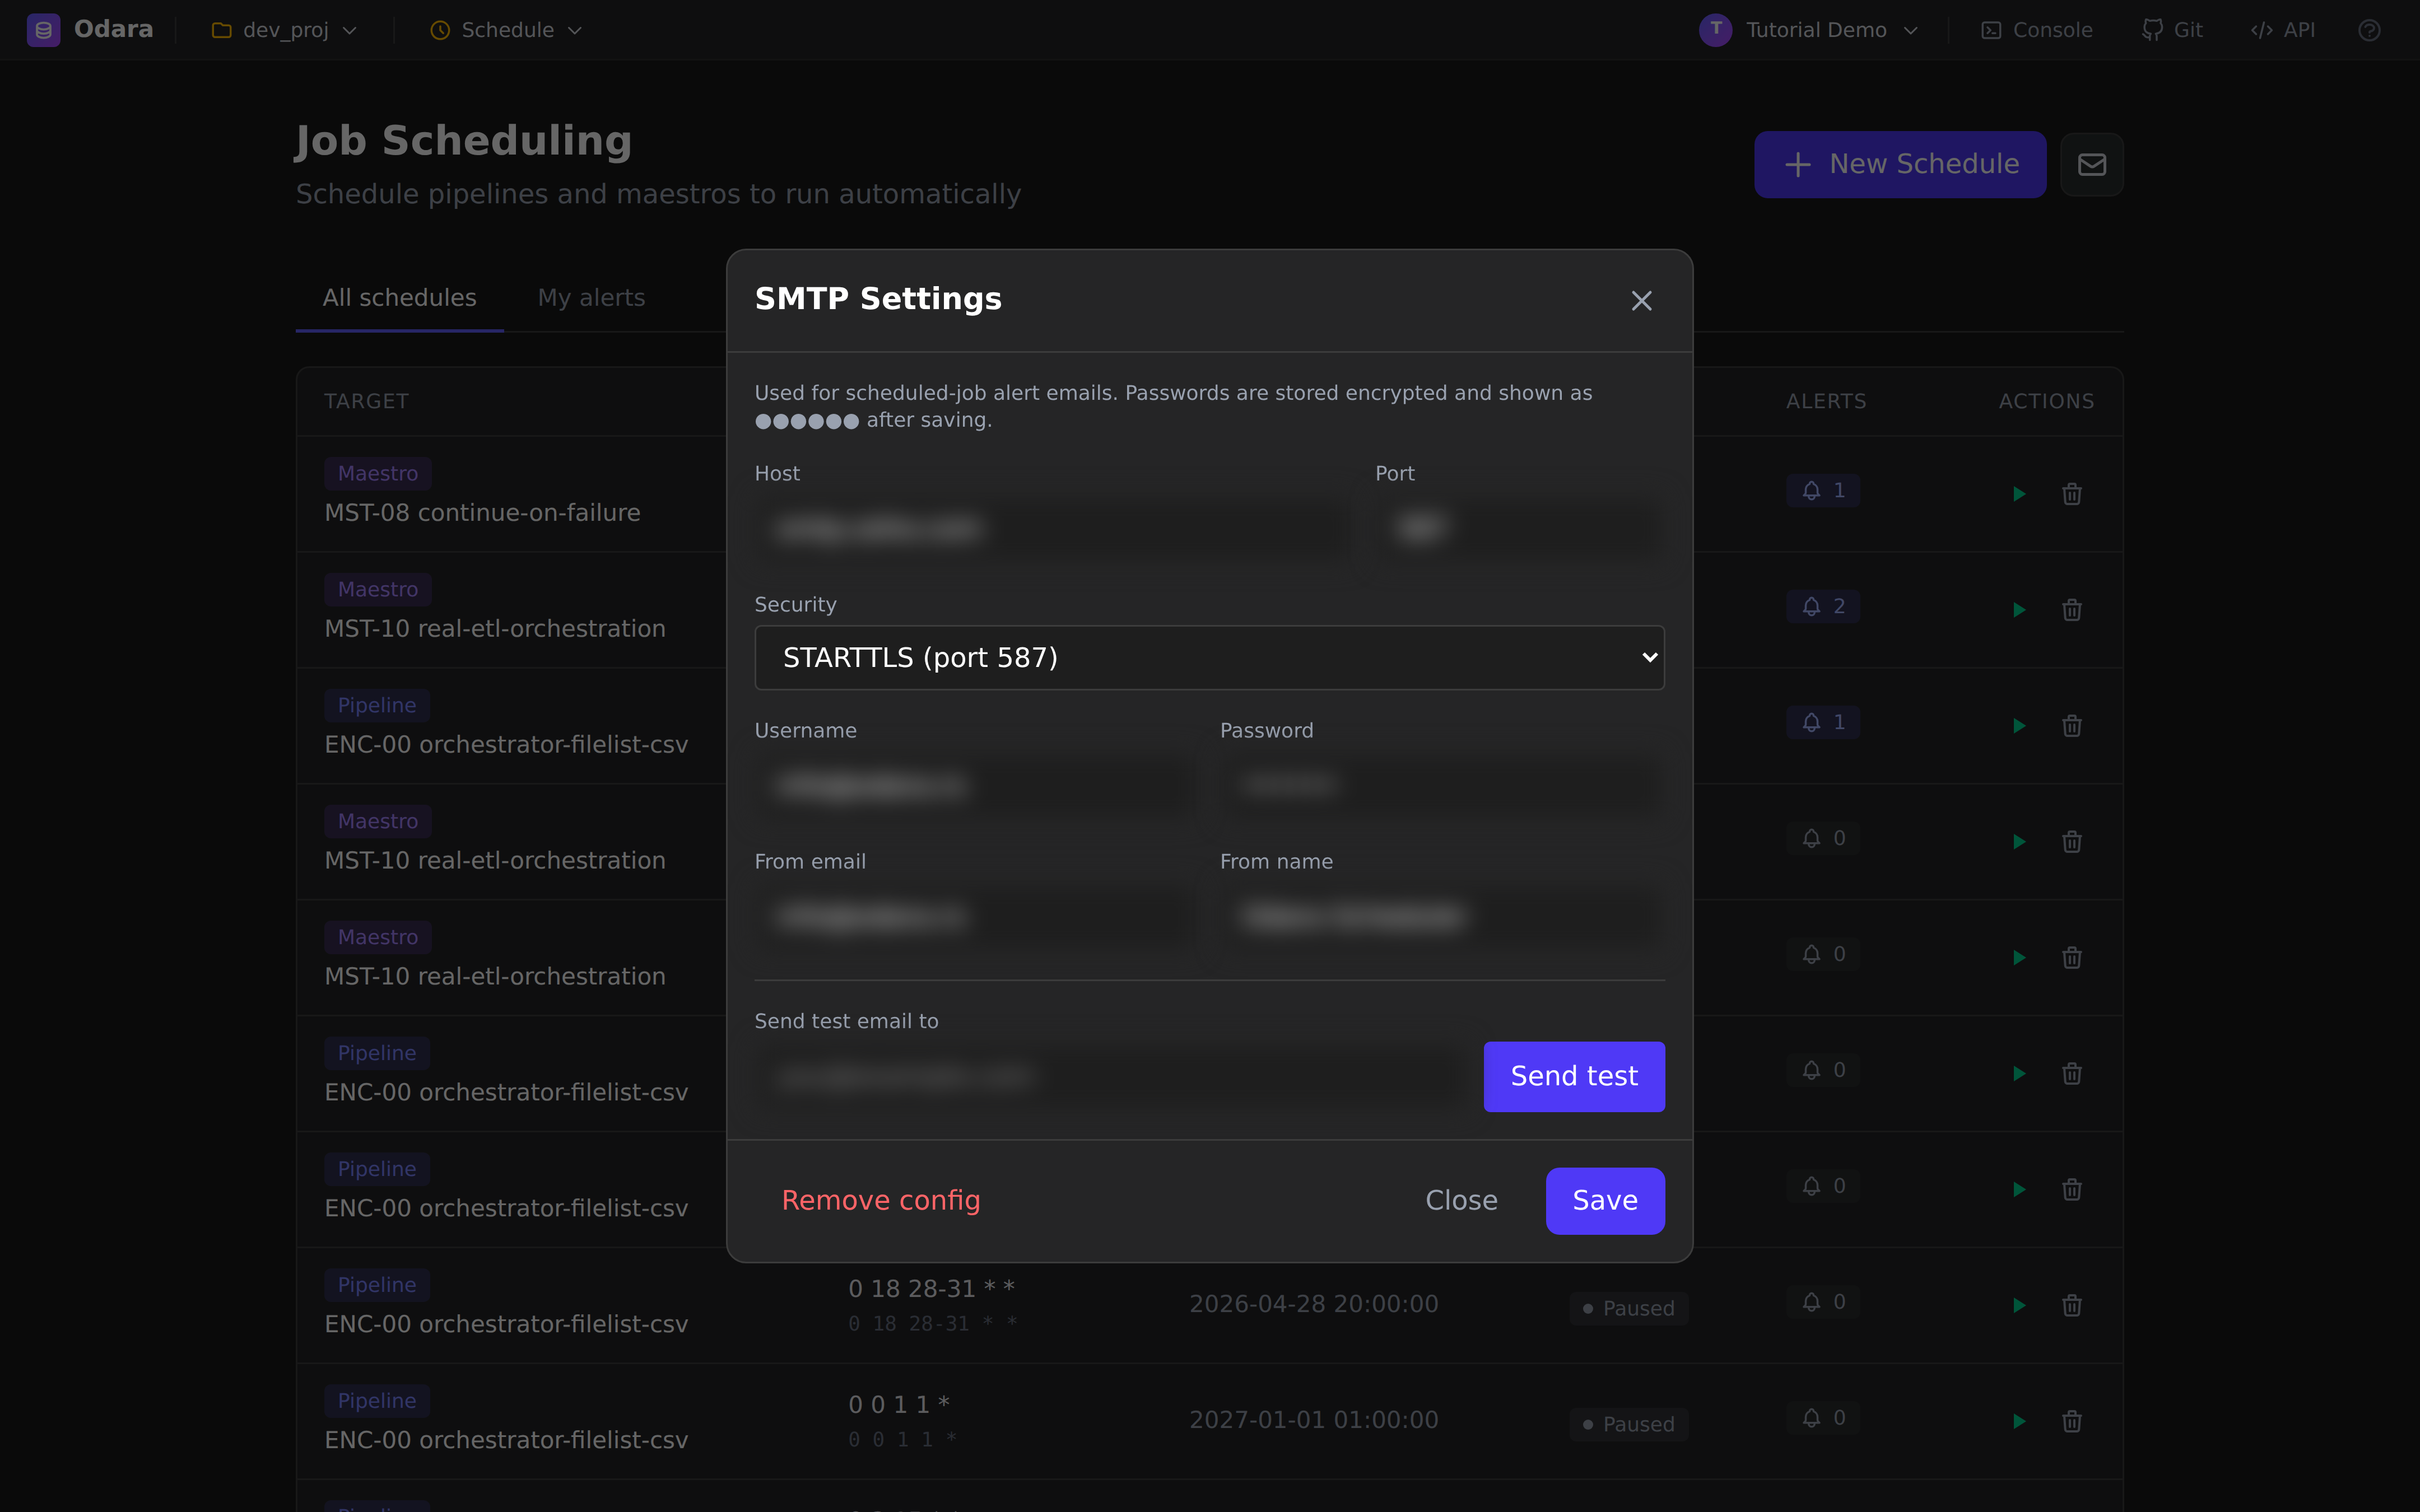
The SMTP Settings dialog opens. The credential fields
(Host, Username, From email, etc.) are blurred in this screenshot —
on your own install they are plain text while editing, but passwords
are stored encrypted and only ever displayed as ●●●●●● after saving.
Fill in your provider's details (Gmail, SendGrid, your company's Postfix, anything that speaks SMTP), pick the right Security mode (STARTTLS for port 587, SSL/TLS for port 465, or none for port 25 on a trusted internal relay), and click Save.
The Send test field lets you fire a one-shot test email to any address — useful for confirming the server can actually reach the internet before you wait for a 2 a.m. job to fail.
My alerts
Once SMTP is configured, every user can switch to the My alerts tab to see which schedules they are subscribed to:
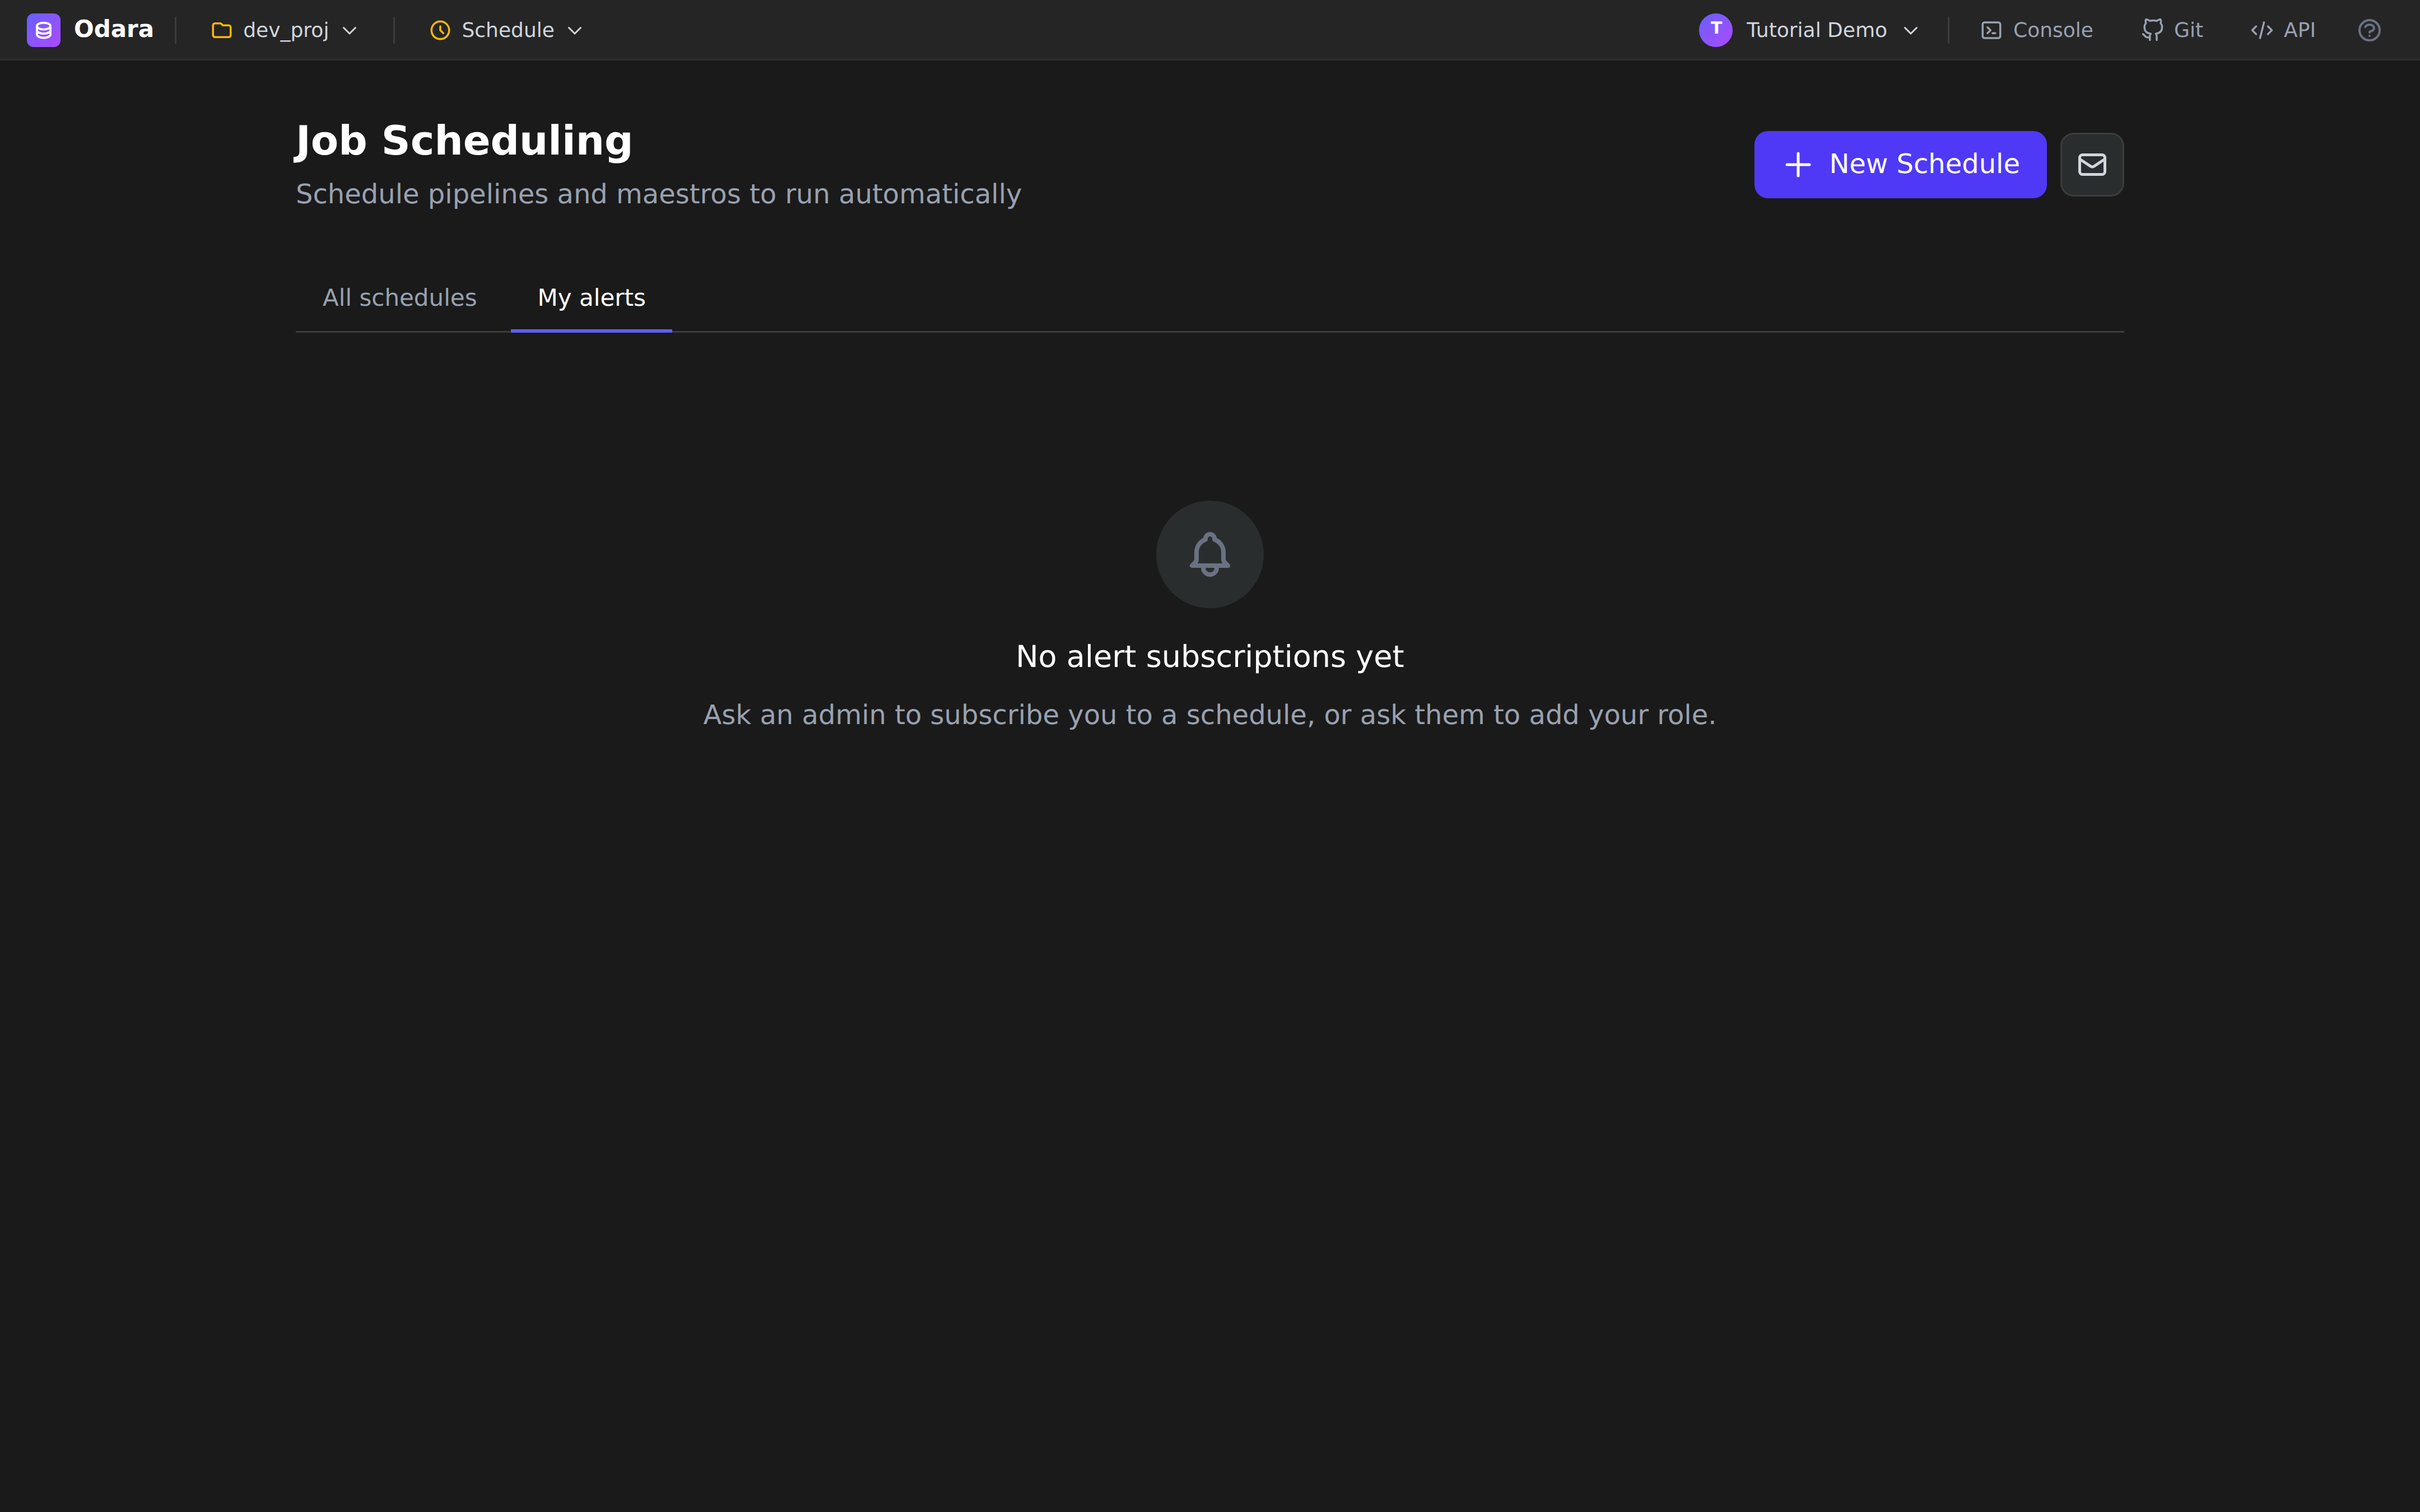
On a fresh install the tab is empty — "No alert subscriptions yet. Ask an admin to subscribe you to a schedule, or ask them to add your role." Admins do the subscribing from the All schedules tab.
Why admin-mediated? Schedules notify users by name or by role (e.g. "everyone in the
data-opsgroup"), and only admins can read the user list and edit role memberships. Regular users can always unsubscribe themselves.
6. Pause, run-now, delete
Hover any row in All schedules and two icons appear on the right of the Actions column:
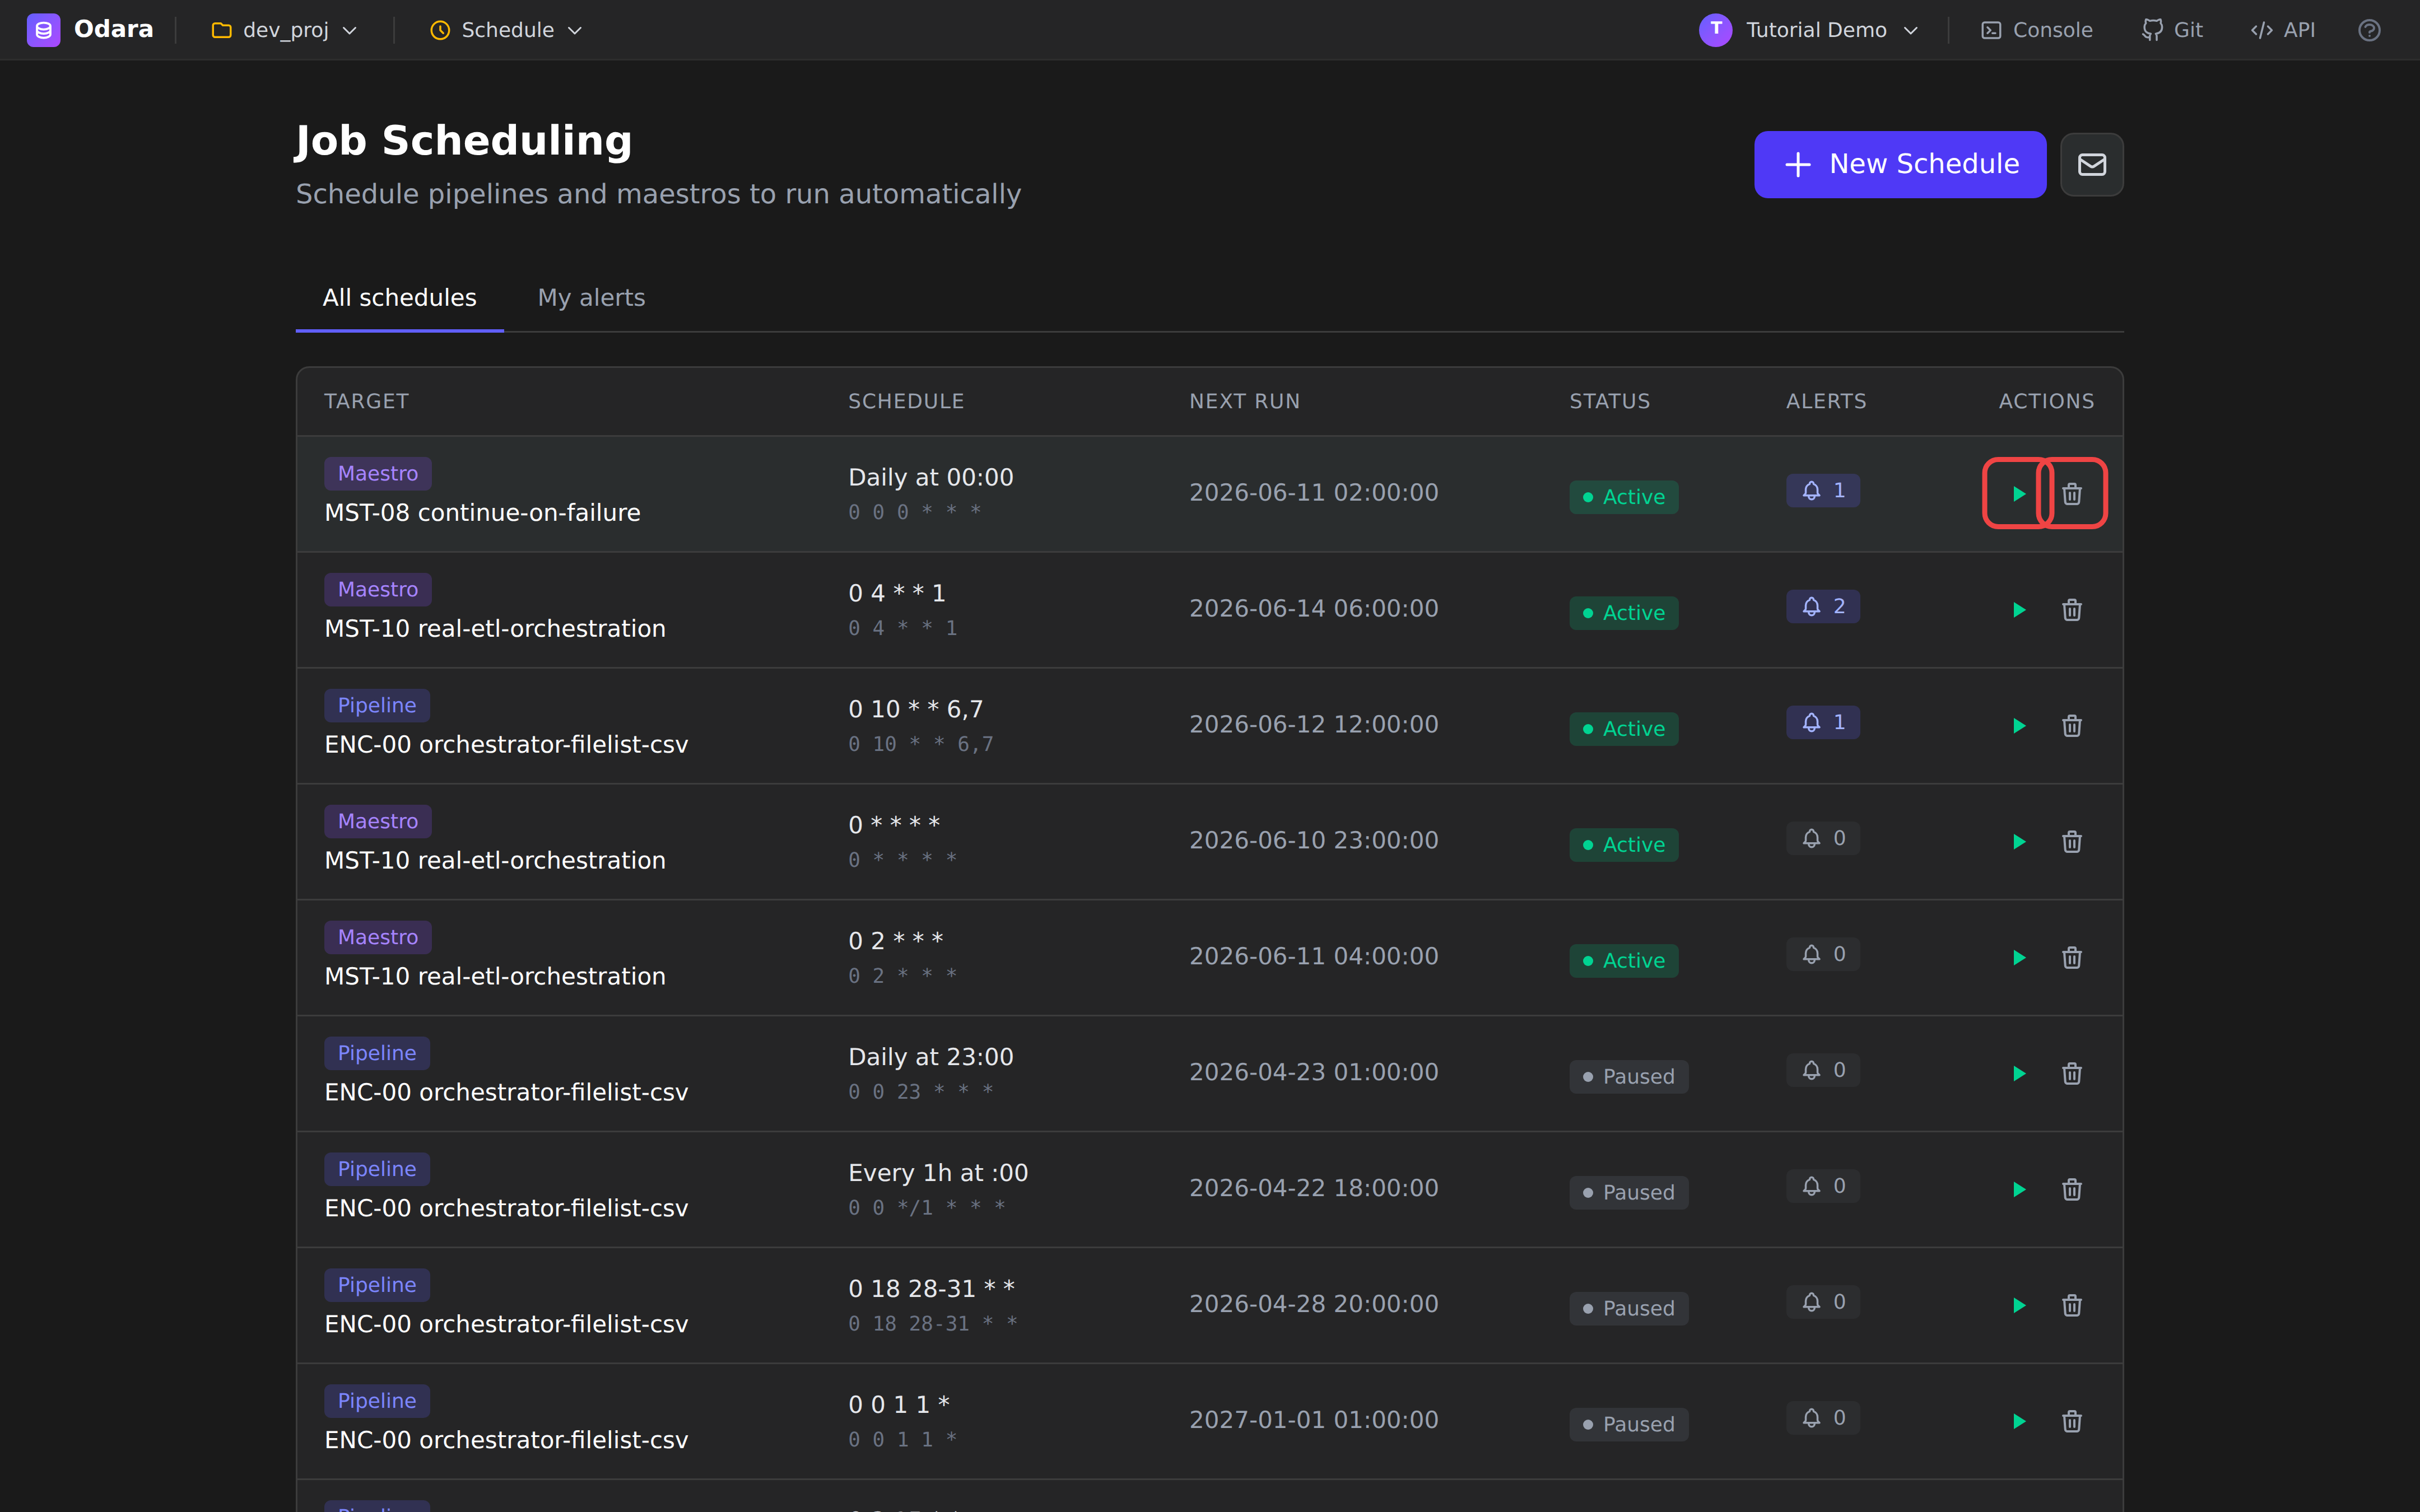
- ▶ Run now — fires the schedule immediately, regardless of its next scheduled time. The run shows up in Monitor the same way an on-time fire would.
- 🗑 Delete — removes the schedule. The underlying pipeline or maestro is untouched; only the schedule entry goes away.
To pause a schedule without deleting it, click its Active badge in the Status column — it turns Paused; click it again to resume. Paused schedules keep their cron and their alert subscriptions, they just don't fire until you flip them back to Active. To change a schedule, double-click its row.
Cheat sheet
| I want to… | Do this |
|---|---|
| Run a pipeline every day at 3 a.m. | New Schedule → Visual → Daily → 03:00 |
| Run something every 15 minutes | New Schedule → Advanced → */15 * * * * |
| Run on weekdays only | Advanced → 0 9 * * 1-5 |
| Fire a one-off test run | Hover the row → click ▶ |
| Stop a schedule temporarily | Click the Active badge → Paused |
| Get an email on failure | Configure SMTP → admin subscribes you on that schedule |
| Stop getting an email | My alerts tab → unsubscribe |
| Delete a schedule | Hover the row → click 🗑 |
What you learned
- Schedule is the single place every cron lives — daily, hourly, or custom — for both pipelines and maestros.
- Visual Builder covers the common cases without writing cron; Advanced (Cron) handles everything else.
- Schedules can be Active or Paused without losing their config.
- Alerts have two layers — SMTP (once, by an admin) and per-schedule subscriptions (per user) — and admins manage who is subscribed to what.